Inventory System

After a couple of months of intense school work, I wanted to work on something of my own and improve my knowledge.

An inventory system made in Unreal Engine and C++.

This system allows for stackable items of various types and sizes plus a carrying capacity and weight system.

The system is structured in a way that allows easy improvments and additions.

Features

ItemData

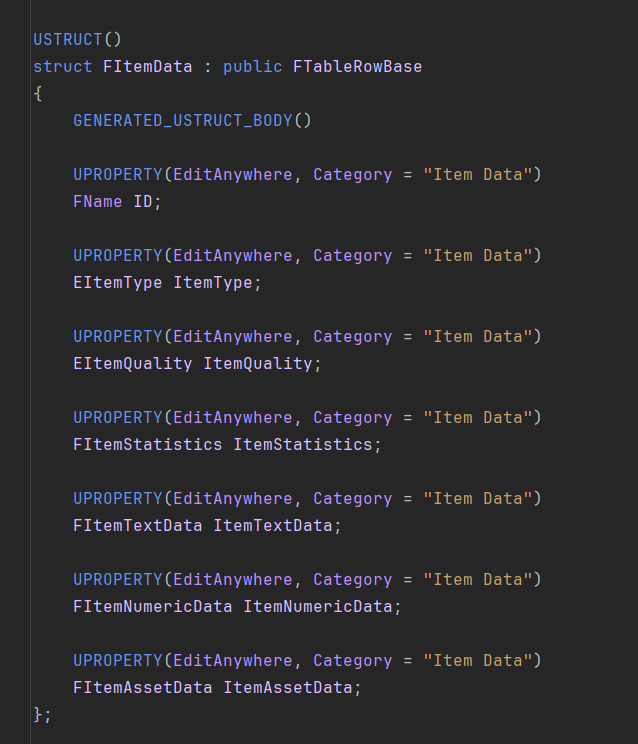
Item Data Struct

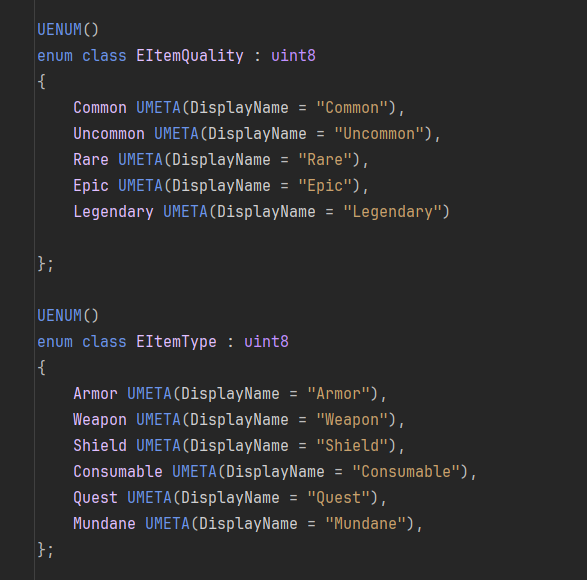
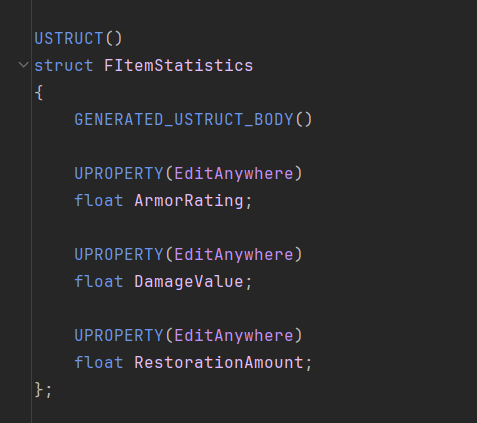
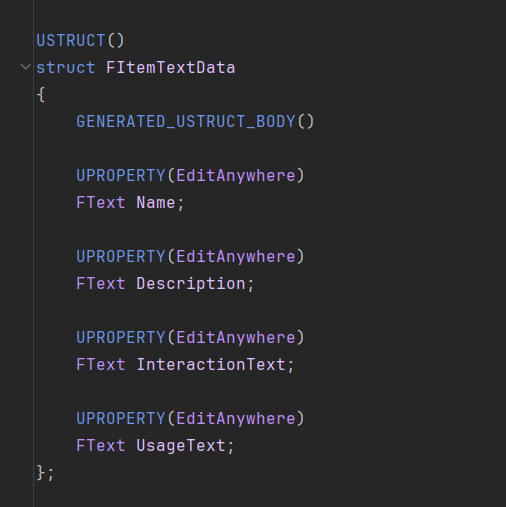
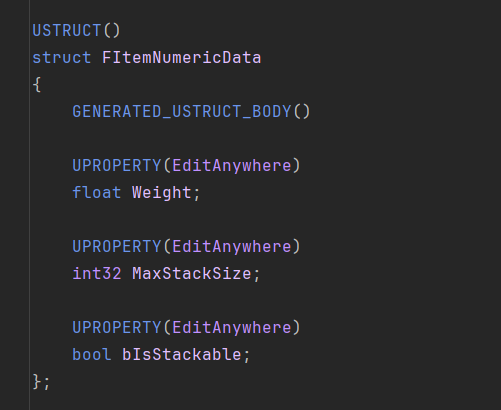
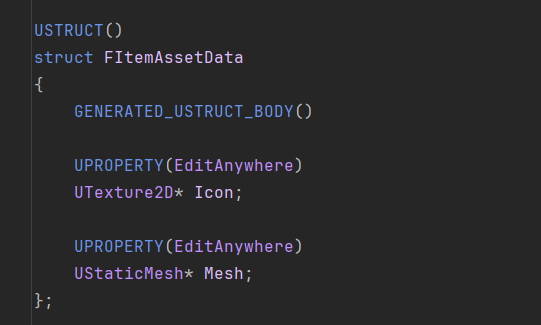
I wanted to make the items modular, expandable and clean. To do this I made an .h file that is divided into one main struct and multiple other structs and enums that holds the different data. For example, I have an enum that has the different qualities/rarities that an item can have (common, rare, epic, etc) and another one for what type of item it is (armor, consumable, etc). And the other structs are for for example, AssetData which is for what icon and mesh it should have. The main struct then puts everything together into one condensed struct that is more viewable when we use it in our data table.

Data Table

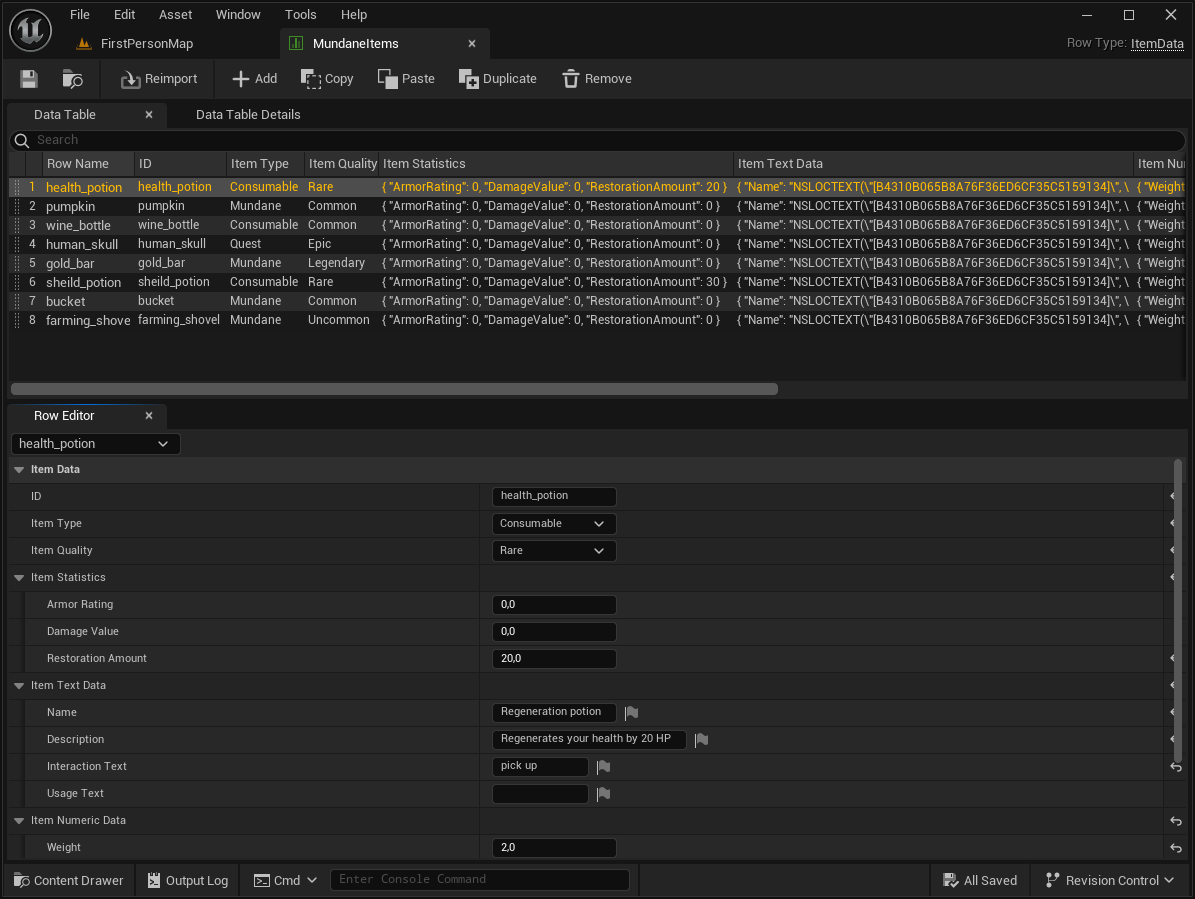
As mentioned, the main struct is used as the base for our Unreal Data Table which is where we make and decide the information of each item. This is also the table that our for example pickup blueprint uses.

x

Interaction

For the interaction with objects and items I wanted it to be simple but expandable. I also wanted to make sure you could only interact with what you were directly looking at. To make this possible I decided to divide it into two parts. The interaction check and the actual interaction part. I added a pink overlay material to visualize when you can interact with it.

Interaction Check

I created an interaction check function that uses a simple linetrace that's sent from the camera and straight forward, making sure to follow its rotation, to see if you are looking at an interactable object. If an interactable object is hit, the linetrace gets the targets interactable data and displays it on an interaction interface.

The Actual Interaction

When it comes to actually interacting with the objects, I decided to divide it into three functions. BeginInteract(), Interact() and EndInteract(). This is to give the ability to customize the interaction more and give more possibilities and expandability. These function runs when you press the interact button which I have put as the keyboard key 'F'. These three is what the player has. However, I decided to give each interactable object its own Interact() function. More on this later.

As per the name, BeginInteract() is the first function run and does so as the key is being pressed. When it runs it first runs the interaction check function once more and checks if the interaction data matches the current interactable. If this is true it then checks if its a valid object. If these are both true it then runs the Interact() function.

The player Interact() function is pretty simple. All it does is call the Interact() function that the interactable objects has. That's it! This ties into why I divided it. This way I can specify what will happen to each object when its interacted with by giving the Interact() function in said object the functionality. I might want to pickup some types of objects but only inspect some objects and I keep the code organized at the same time.

The same applies to the EndInteract() function. All this function does is call the interactable objects EndInteract() function. As stated above, this is to allow for expandability and customizability.

Inventory

This is the main part of this project, the inventory system. In this case that also mean that it's the most complex part but I'm going to try and not drag on to much.

The system is condensed into one component called inventory component. This handles everything from weight and capacity to stackable items. So how does it work when you add an item to the inventory? There are a lot of checks going on when that happens. Lets go through it.

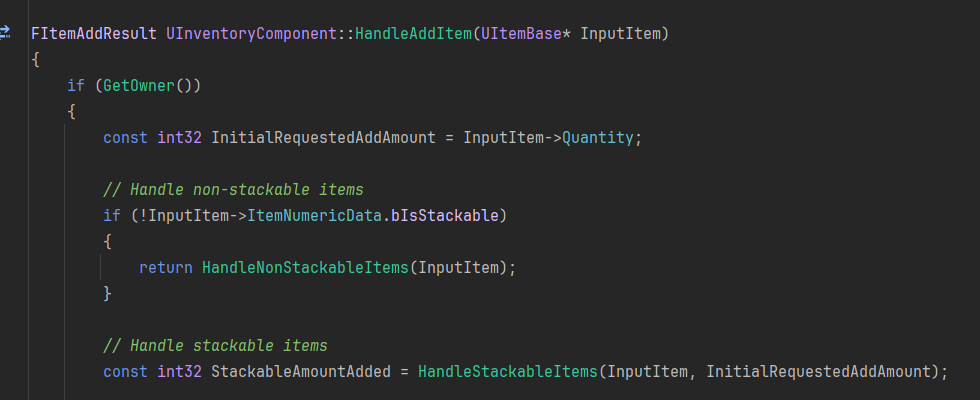
First when first interact with the pickup item it runs its interact function. This function first runs the inventory components HandleAddItem() function. This function checks for a few things.

First, it checks if the item we just picked up is non-stackable. Depending on what it is it either runs the HandleNonStackableItems() function or the HandleStackableItems() function.

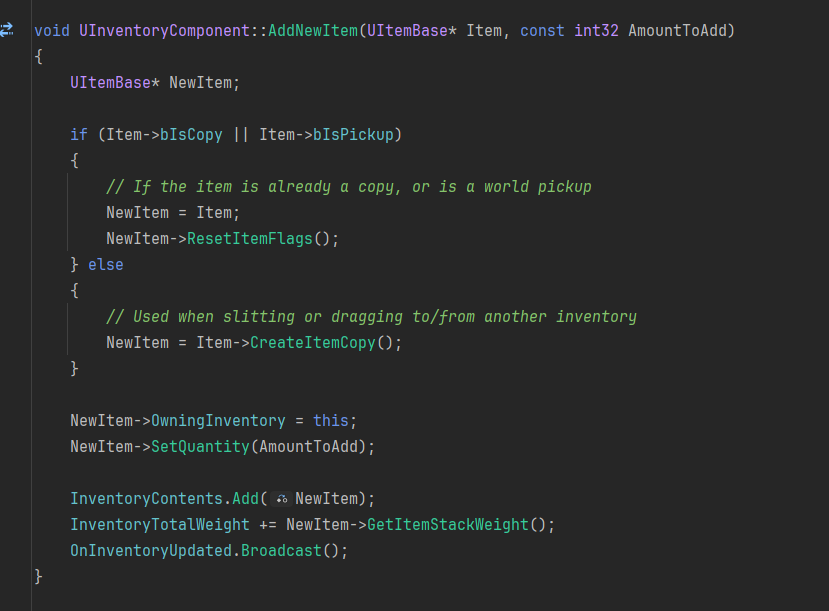
No matter what function was run we come to the AddNewItem() function through those functions.

The AddNewItem() function is the last function that gets run. This function finally adds the new item to the inventory content array so that it can be displayed in the inventory.

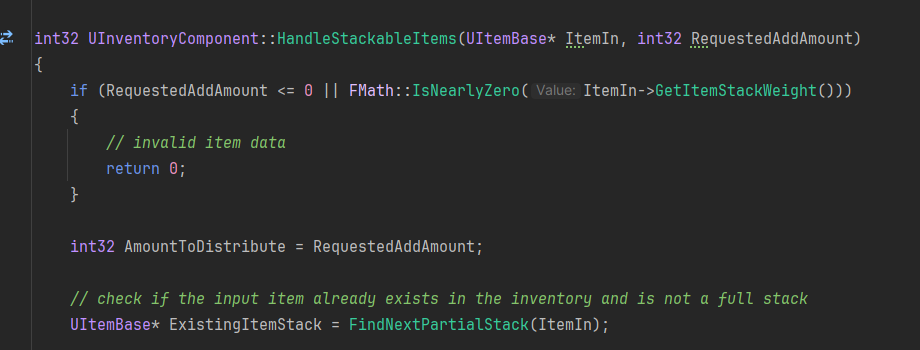
HandleStackableItems()

This function is the biggest one since it needs to check the most stuff.

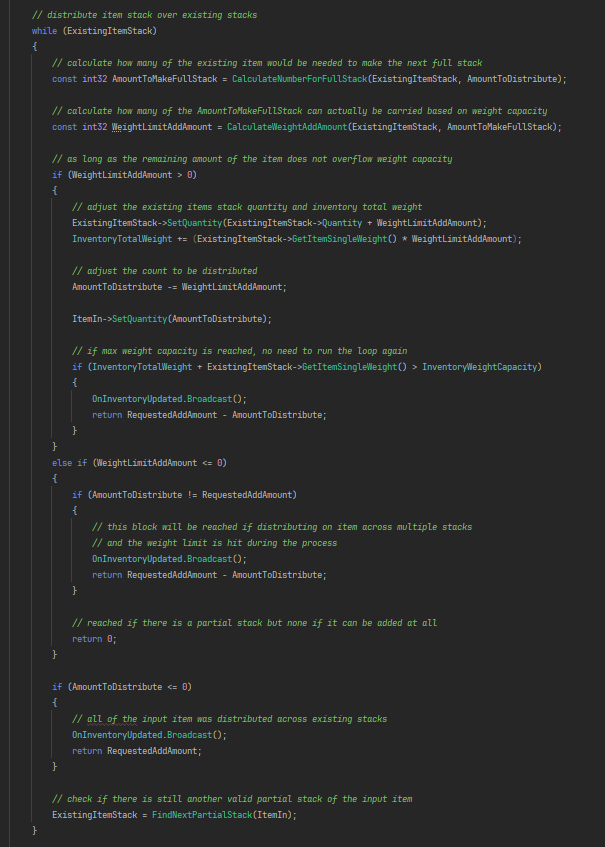
First we make sure the requested amount added isnt <= 0. Then we check if the item we want to add already exists in the inventory and isnt a full stack.

Then in a while loop we first calculate how many of the existing items would be needed to make the next full stack. Then we calculate how many we can carry based on weight capacity.

Then as long as the remaining items doesnt overflow the weight capacity, we adjust the existing item quantity, inventory total weight and adjust the count the be distributed.

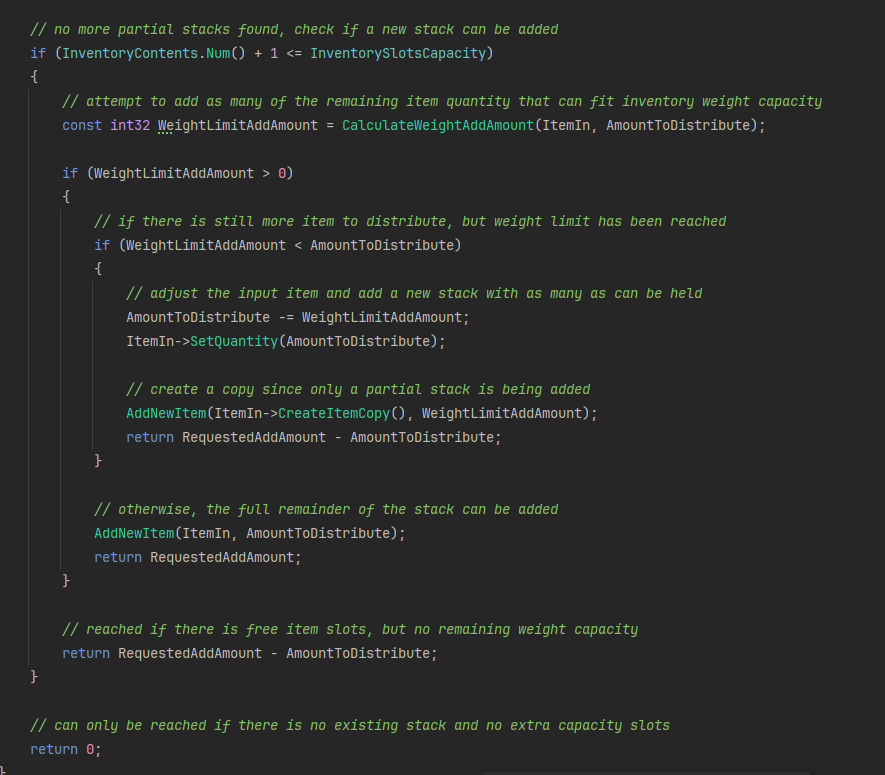
When thats all done we exit the while loop and if there are no more partial stacks then we check if we can add a new stack.

If possible, we add as many of there remaining item quantity that fits in the inventorys weight capacity.

If there is still more items to distribute but the weight limit is reached then we adjust the input item and add a new stack with as many that can be held.

Otherwise, we add the full remainder of the stack.

HandleNonStackableItems()

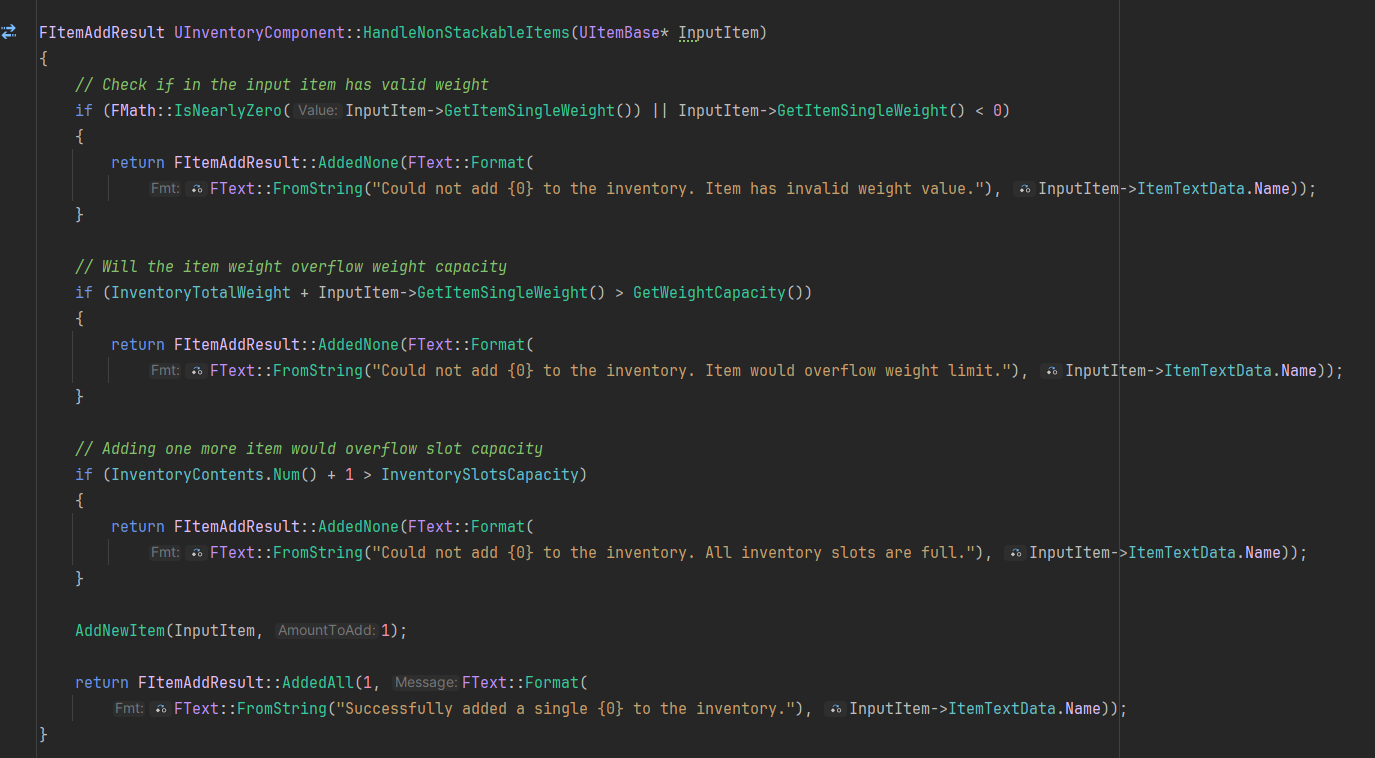
If the item isnt stackable then we run the HandleNonStackableItems().

This function first does a lot of checks to make sure there arnt any errors. It check if the item has a valid weight, if the item will overflow the weight capacity and if it would overflow the slot capacity.

If everything is good on those fronts then we run the AddNewItem() function.

Tooltip

The tooltip is pretty simple. Pretty much, when the item slot in the inventory panel gets created I also create a tooltip at the same time that stays hidden. When a slot is then being hovered over, the tooltip gets initialized and grabs said items information.

Tooltip Class

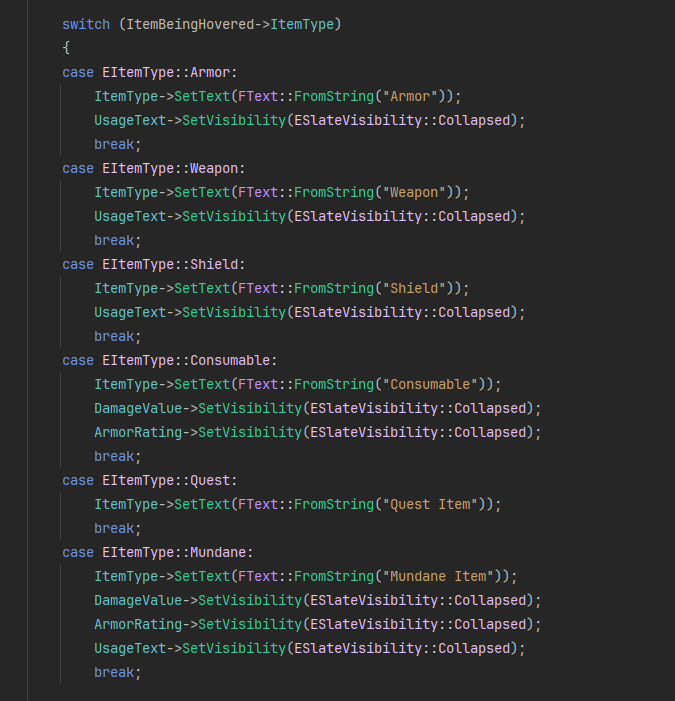
The tooltip class is what makes sure the information gets displayed correctly. In the tooltip.cpp files NativeConstruct() function, I have a switch that check for what item type is being hovered. Depending on what type it is (armor, consumable, weapon), it displays the corresponding information needed.

x

Item Switcher

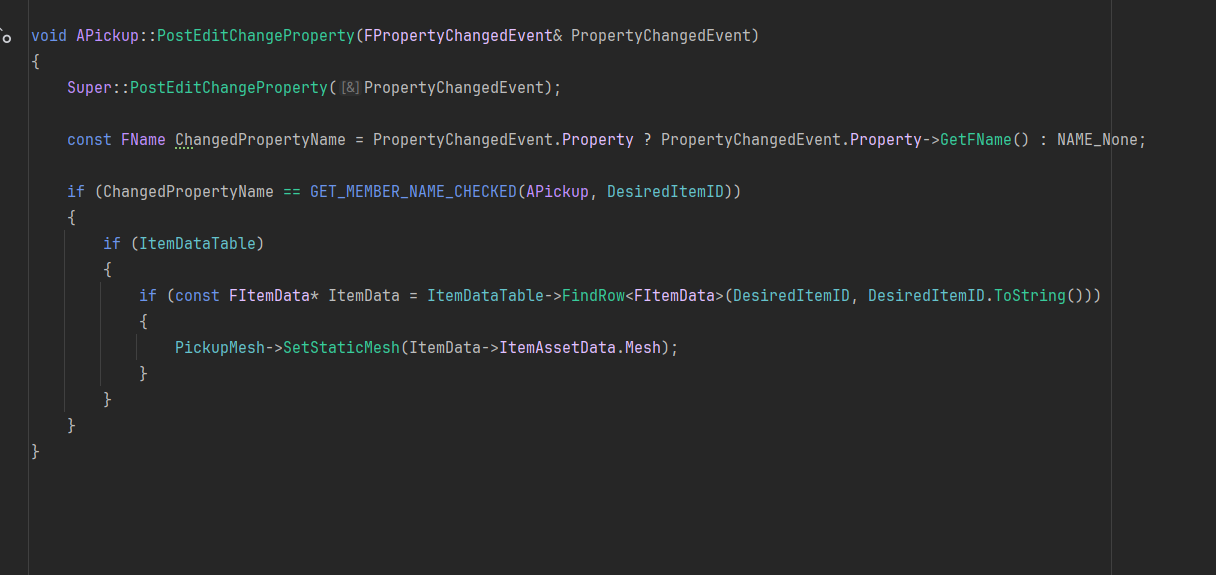
The item switcher works by adding a PostEditChangePropery() function in the pickup files. This function checks for if the Desired Item ID property is changed. If its changed it check if that id matches the id of a row in the Item Data Table. If these are true, it takes the mesh data from the item in said row and applies it to the pickups mesh.